

Documentation
Blender Exporter Manual
3 Overview
Overview
This manual covers the installation and usage of the blender exporter for Indigo Renderer. By following the tutorials in this manual you should be able to export your scene in a high-quality way ready for Indigo to render.
Note that the Blendigo exporter is a very complex piece of software and not all the features are covered in depth by this manual. If a feature of Blendigo is not described to your satisfaction, visit our forum and post a question and we will be happy to help you out. Our forum is available at:
http://www.indigorenderer.com/forum/
About exporters
Indigo is independent of modelling package and uses it's own file format - called an Indigo Scene File (.igs). Before Indigo can render your scene, it must be converted into an igs file. The job of an exporter is to create an .igs file from your currently open scene.
About the Blender exporter
The Blender exporter is called 'Blendigo' and is the result of many peoples work on the exporter. Glare Technologies would like to thank the following people for their contribution to Blendigo:
Nick Chapman, U3dreal, Zuegs, Ewout Fernhout, Leope, psor, Wedge, SmartDen, BigFan and DaveC.
Installing Blendigo
Step 1. Ensure Blender is installed correctly
Most of the problems people have with using Blendigo are due to Blender being incorrectly installed. We recommend you re-install the following packages to ensure that Blender is installed correctly.
Blender Get the latest release of Blender
from:
http://www.blender.org/download/get-blender/
Python Get Python 2.5 from:
http://python.org/download/releases/2.5.4/
When you start Blender - the console window should give you a message saying it found the installed Python.

You are now ready to install Blendigo.
Step 2. Download and install Indigo
Download Indigo for your system and install it to the default location. Instructions for doing this are in the Indigo Manual.
http://www.indigorenderer.com/download/
Step 3. Download and install Blendigo
Download the version of Blendigo for your system from:
http://www.indigorenderer.com/download/
Blendigo comes with an installer for Windows and Mac. Both installers will look for a "scripts" directory in all known locations for Blender.
Blendigo expects to find Blender at these locations:
Windows c:\Program Files (x86)\Blender Foundation\Blender\
Mac /Applications/Blender
If the installer reports an error that it cannot find Blender on your system - please follow the instructions in Step 1 again and ensure you install to the default locations. If you have further issues - email us at support@indigorender.com.
If you are installing on Linuxthen you need to download Blendigo for linux and run the following commands:
tar xvfz blendigo-...-linux.gz
cd blendigo
cp -R * ~/.blender/scripts/
Restart Blender after installing Blendigo and you should see see "Render with Indigo..." become available under the Render menu.

Step 4. Split your viewport and open Blendigo
To use Blendigo in the recommended way - you should split your viewport and have Blendigo open on the left hand side of your screen like so:
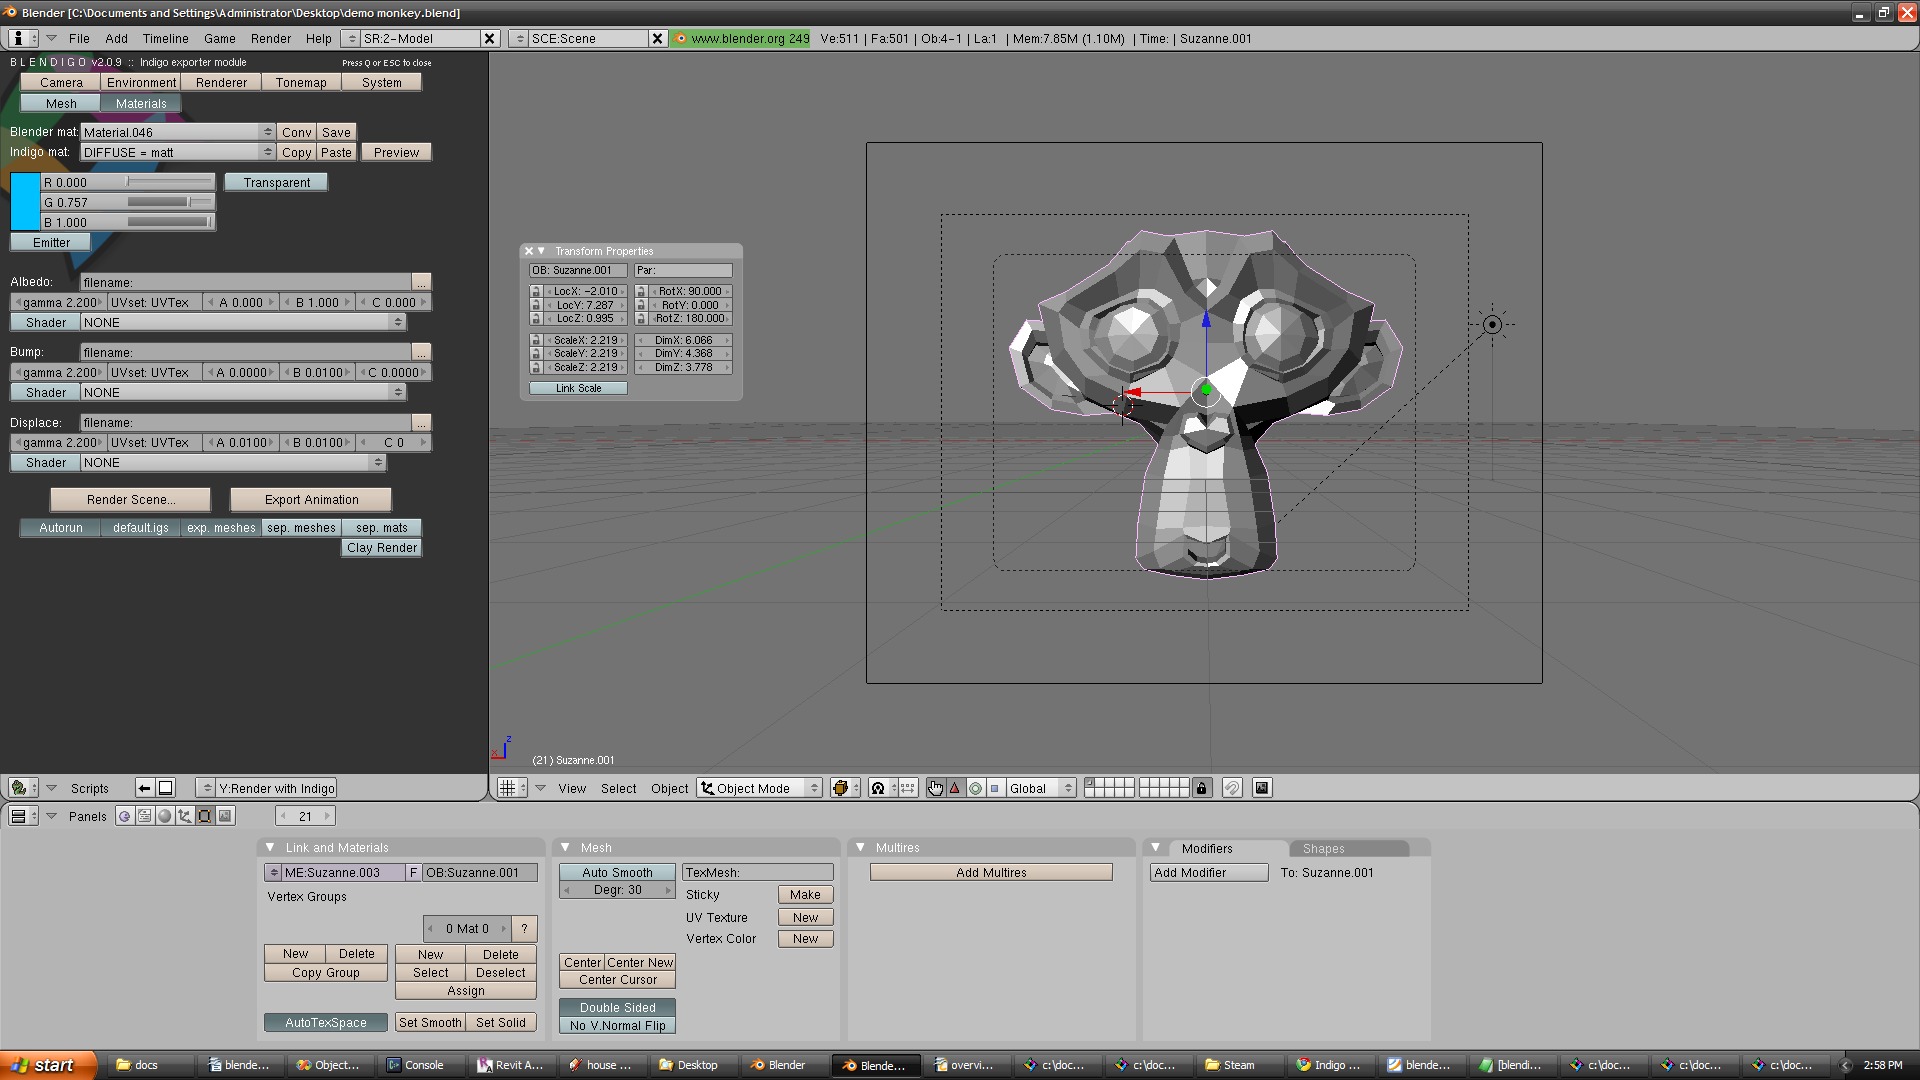
Blender with Blendigo open on the left and the 3d view open on the right.
To split your view - right click on the bottom of the blendigo menu bar and press split area.
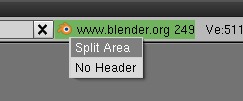
Right cick on the black line under the titlebar
Click anywhere in the 3d window to confirm the split, then go to the render menu and press "Render with Indigo...". Blendigo will now open and stay open while you configure your scene.
You are now ready to use Blendigo.
Things to know
There are several concepts you need to know to know to fully understand how Indigo works and how Blendigo treats these concepts.
Indigo is physically based
Indigo is a physically based renderer, that means that if is possible to construct a photo in the real world, it is possible to render it in Indigo. Blendigo has the job of converting the virtual world of Blender into the real world representation used by Indigo.
Users with experience of studio photography may find setting up a scene in Indigo a familiar experience.
Units of measurement
Indigo works on units of metres. Blendigo by default converts on Blender unit of distance to one metre in real world space. Select an object and press n to see the position of the object in blender units to get an idea of the scale of your scene.
Light sources
Blender has some lightsources that do not exist in the readworld - for example point lights (lights that are infinitesimally small and exceptionally bright) and 'invisible spotlights'. To use Indigo correctly you will need to master 'emitting materials' to create realistic lights in your scenes.
Getting to know Blendigo
This section will familiarise you with the Blendigo plugin.

1. The toolbar
The toolbar lets you switch between different screens in the Blendigo. In the screenshot above, the camera screen is currently selected (notice the orange line under the camera button).
2. Main section
Blendigo has 7 seperate screens to control different parts of the export. The camera screen is shown, controlling aspects of the Indigo camera. Clicking on buttons in the toolbar will change the main section. Blendigo will remember your settings as you go from one screen to the next.
3. Start render buttons
The "Render Scene..." button is available on every screen. Press it to export the scene and start Indigo.
4. Render control buttons
These buttons are available on every screen. Each button can be toggled on or off. See the next section for their functions
Render control buttons
Autorun
If selected, Indigo is launched after the Indigo scene has been exported. If this is deselected, then you must save your Indigo scene somewhere and start rendering it yourself.
Default.igs
If selected, Blendigo will generate a unique filename for your render. If this is deselected then Blendigo will ask you for a filename to save your Indigo scene file.
Exp. Meshes
If selected, Blendigo will generate meshes for all the models in your scene when exporting. It can be disabled to speed up Blendigo when working with extremely large scenes, in this case the meshes will only be exported onces and won't be re-exported everytime you change the material or camera settings.
Sep. Meshes
Writes the meshes to a seperate .igs from the main scene file. We recommend you leave this feature unselected.
Sep. Mats
Writes the materials in the scene to a seperate .igs from the main scene file. We recommend you leave this feature unselected.
Clay render
If selected, exports the scene with all the materials replaced with a grey clay material. This can be used to get a quick 'draft-view' of the scene.
Clay render on Clay render off
Environment settings
The Environment screen controls the world lighting and background colour of the scene. The different environment settings are accessible from the dropdown.

The worldscale values control how many metres 1 Blender Unit is
equal to. The default is 1 blender unit = 1 metre.
No Environment (lit by mesh emitters)
If this is selected then there will be no 'ambient light' in the scene and you must place your own lightsources in the scene. The background will be black when no environment is used.

Suzanne rendered with a mesh emitter and no environment.
Environment map
This setting requires you have an .exr file to use as an environment. Indigo uses the exr file as the background image and also as a light source. See http://indigorenderer.com/documentation/exr/for more information about the exr file format.
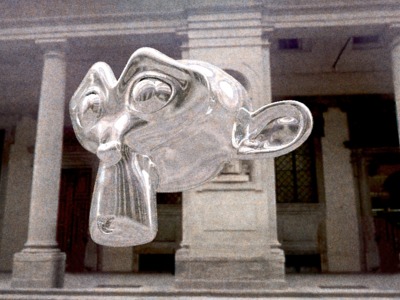
Suzannes rendered with the uffizi-large.exr environment map.
Physical sky+sun
With this setting, Indigo will render a blue sky as the background of the scene and use a realistic sun to light the scene. The sky is modelled on a northern hemisphere sky. You must have a sun lamp present in your scene. Use menu->add->lamp->sun to add a sun lamp. The angle of the sun in the sky will be copied from the angle of the sun lamp.
Suzanne with a physical sky+sun environment
Background Colour
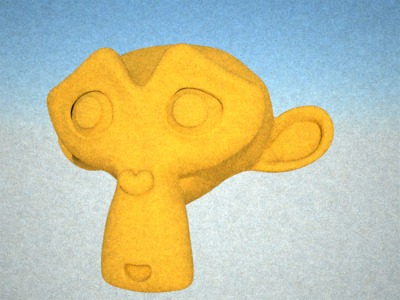
This environment setting is seldom useful. It is better to model a real studio setup (see the Indigo Techniques manual) - but as a quick alternative it is possible to change the background image of the scene using this setting.

Suzanne with a grey background environment and a mesh emitter.
Renderer settings
Renderer settings are for controlling the inner workings of Indigo. Most Indigo users will never have to modify from the default Blendigo settings.

The only two options that may be useful to casual users are the bidirectional and metropolis. Some scenes will render faster with one or both of these techniques disabled.
See the Indigo techniques manual for more information about bidirectional and metropolis.
Tonemapping settings
For most users - we recommend you leave these settings to the default and modify your tonemapping settings interactively in the Indigo GUI.

See the Indigo manual for a full description of the various
tonemapping settings and how they effect your output image.
System settings
System settings are for controlling the Indigo application. Most Indigo users will never have to modify from the default Blendigo settings.

The settings that may be useful to casual users are:
Halt time
Number of seconds to keep rendering for. Indigo will stop rendering and wait for the user to save the image after this amount of time.
Halt samples per pixel
Indigo will keep rendering until the specified number of samples per pixel is reached. The correct spp value differs for each image but a value of 200 spp is suitable for many simpler scenes.
Camera settings

The camera settings page controls the configuration of the virtual
camera in the scene. The camera in Indigo is modelled on a real
camera so the settings on this page will be familiair to users with
a background in photography.
Film ISO
This setting controls the camera ISO settings. It is only used when the "camera" method of tonemapping is selected. See tonemapping for more information.
Exposure
This setting is used primarily to control motion blur. The other effect of exposure time (image brightness) is controlled instead by the tonemapping process.
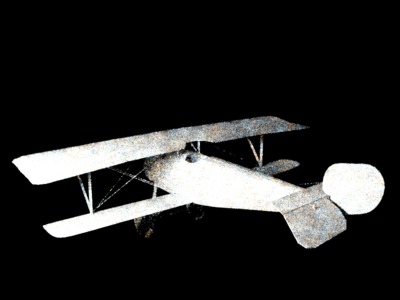
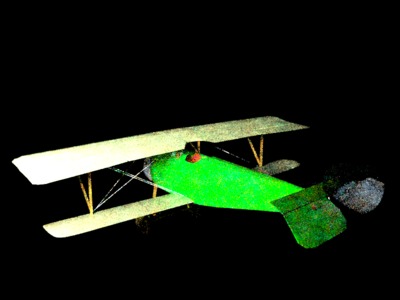
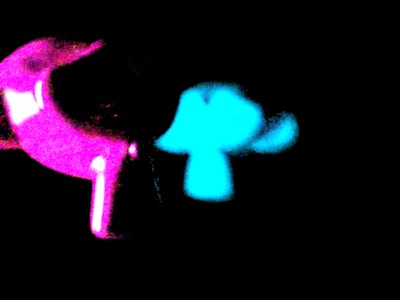
F-Stop
This controls the focal length of the camera. Small f-stop numbers will make things that are out of focus more blurry (similar to shooting a photo in macro mode). Higher f-stop numbers will make everything in the scene equally in focus (this is similar to the effect of shooting a photo with a telephoto lens).
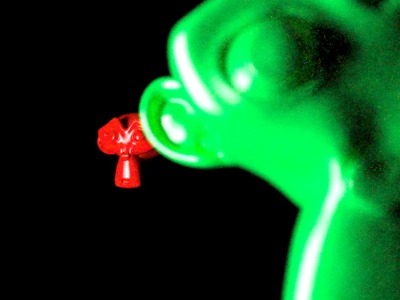
Scene rendered with a f-stop of 0.5. The camera is focussed on the red suzanne which is 30 metres from the camera. Notice the green suzanne is out of focus and blurred.
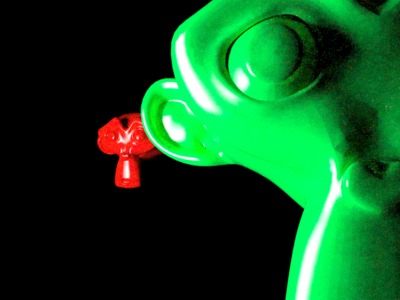
Same scene rendered with a f-stop of 64. Notice that both models are similairly in focus.
Aperture diffraction
Enabling aperture diffraction causes Indigo to render the 'star' effect around bright objects in the scene. This star effect is commonly seen in photos of spotlights.
To make aperture difffraction visible - you need to set a high f-stop (which causes a smaller camera aperture), have a small and extremely bright lightsource visible and then enable aperture diffraction.
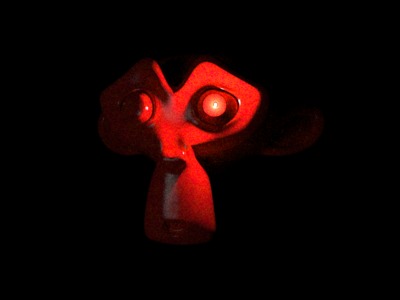
Suzanne rendered with aperture diffraction off
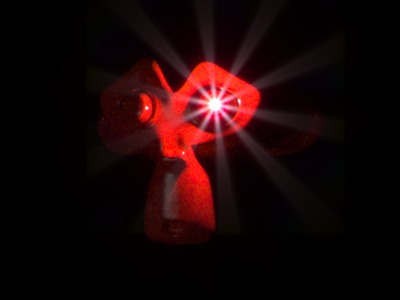
With aperture diffraction on
Blades, Offset and Curvature
These parameters control the shape of the camera aperture, these settings aperture is only noticed when viewing the effects of aperture diffraction.
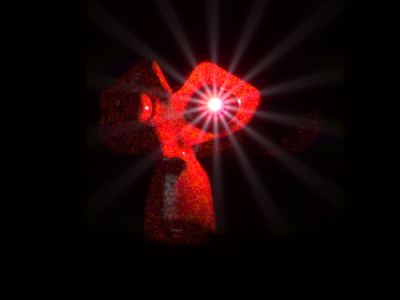
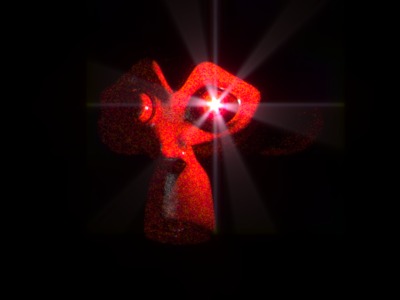
Diffraction with 3 blades Diffraction with 7 blades
See the Indigo technical manual for more details on configuring the shape of the aperture.
Obstacle map
The obstable map is for loading an image that will be mapped over the camera lens - this can be used to simulate dust, finger smudges and scratches on the lens.
White balance
Controls the whitepoint of the scene. See the Indigo manual for details on configuring white balance, as this can be changed interactively once the scene has started rendering.
Focal distance
This value will be ignored if Autofocus is set (the Autofocbutton is pressed). It controls the distance at which the camera is focussed. If you have a low f-stop, items that are not in focus will appear blurry. With higher f-stop numbers, the effects focal distance becomes less apparent.

Focus distance of 60 metres Focus distance of 2 metres
Image size
Changes the height and width of the image rendered. This setting can be changed in the Indigo program as well.
Mesh settings
The mesh page enabled Indigos internal subdivision tool per mesh.

To use it - you need to have blendigo open, then select a mesh in
your scene and enable subdivision. Indigo subdivision works the
same as the subsurf modifier available in Blender.
It can be useful to use Indigos built in subdivision because the models in Blender can have a low polygon count that are faster to work with - yet you still get a high quality render.
Subdivision in Indigo can also helpful for getting smooth results on objects that have displacement mapping.


Suzanne without subdivision Suzanne with 5 levels of subdivision
Material editor
The materials setting page is used to configure the materials in the scene.

Blendigo will try and convert your Blender materials to Indigo
materials as far as possible - but you are recommend to use
Blendigos material editor for more accuracy and control of your
Indigo materials.
1. Blender material name
This is the name of the blender material you are editing. When you select a new object, the objects material will be selected in Blendigo - so just right click on an object in your scene to select it in Blendigo.
The Convbutton converts the existing blender material into an Indigo material. The Save button will save the current Indigo material into an .igm file (for reusing the material in other scenes).
2. Indigo material type
Specifies the type of Indigo material to create. See the techniques manual for a list of the different material types.
3. Preview button
Press this button to launch the Indigo GUI and view this material as a preview.
4. Color selector
This selects the main color of this material. This color is overwritten by the 'albedo' texture if present.
5. Emitter
If selected, then this material will emit light.
6. Material channels
Use these different channels to control how the material looks. The albedo channel is the primary color of the material, the bump and displacement maps change the bump texture of the material. The A B and C parameters control the scale of the bump and displacement maps. Use the Shader button to write a script using Indigo Shader Language.
UV Sets and Blendigo
Blendigo is very particular about UV Sets, and it is common to come across an error "No such uv set 'default'" when exporting to Indigo. We are working to overcome this bug - but in the meantime, here is the solution.
First - click on your object that is causing an error - and press F9 in Blender.
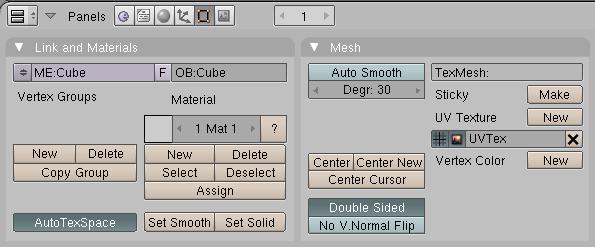
The Mesh control pane in Blender
See where it says UV Texture. In this model, the UV Texture is named UVTex. You then need to open Blendigo and go to the material editor. In the Albedo section - you need to change the "UVSet" parameter to match what the uv texture is called in Blender.
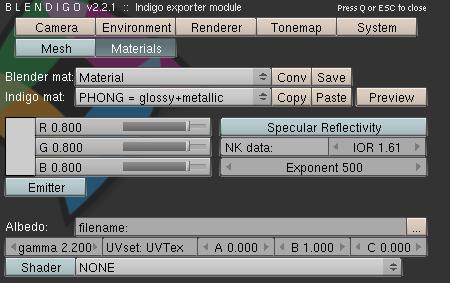
See that the Uvset is called UVTex in this scene. In this material, the Uvset is set correctly.
Going Further
You are now ready to start exploring Blender and Indigo. To learn more about using Indigo - see these resources.
The Indigo website:
http://www.indigorenderer.com/
The Indigo materials database:
http://www.indigorenderer.com/materials/
The Indigo forums are a lively place of debate - you should especially take a look at the Blender sub-forum.
http://www.indigorenderer.com/forums/
If you need support, please email:
We hope you enjoy using Indigo and look forward to seeing your renders!