Render Queue and Animation
Indigo has built-in animation and render queue support, thanks to the Indigo Queue (.igq) format. Render queues integrate smoothly with network rendering, which means you can use all the computers on your network to render an animation or set of images more quickly.
Render Queue
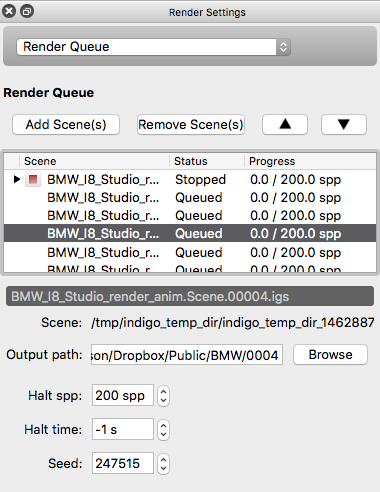
A Render Queue enables rendering a sequence of frames, Indigo scene files, with full control over the rendering process and halt settings for the different frames.
Creating a Render Queue
When exporting an animation from one of Indigo's 3D modelling package plugins, the Render Queue and an Indigo Queue file is created automatically.
When loading a scene from inside the Indigo GUI, only a single item is added to the render queue, however multiple scenes can be added using the Add Scene(s) button, with a halting condition (on rendering time, samples per pixel or both) to specify how long they should render for. To change halt conditions for multiple frames, simply shift click to select the desired frames, or use ctrl - A (cmd-A on Mac OS X) to select all of them, then change the values to your liking. When changing output paths for the rendered frames, you can use '%frame', which will be replaced with the frame index (0001, 0002, etc.).

Overrides
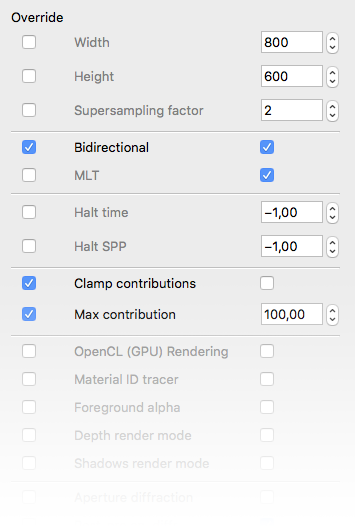
As of version 4, Indigo has override capabilities for all render settings. This enables the user to change parameters like resolution, render method and clamping for all frames in an animation or sequence. To change a setting, use the controls on the right of the setting. To use the new setting for the other frames as well - simply tick the "Override" tick-box on the left.

Indigo Queue and Packed Indigo Queue formats
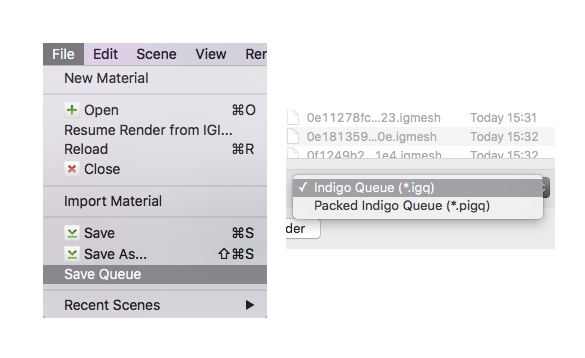
To save an Render Queue, go to File -> Save Queue. You can then choose between an Indigo Queue (.igq) format and a Packed Indigo Queue format.
- The Indigo Queue option saves the Render Queue data by itself and doesn't include any scene data.
- The Packed Indigo Queue is a self-contained archive with everything needed to render a sequence of scenes, including all referenced scenes, models and textures etc and with paths made relative. It can be unzipped with compression programs such as 7-Zip. This is the preferred format for distributing Indigo animations.
Opening either of these files in Indigo will add the referenced scene files to the Render Queue window.
