Indigo Manual > Indigo for SketchUp
Render Settings
The Render Settings Window configures the scene for export to Indigo.
Find it at Plugins > SkIndigo > Render Settings

| Apply to model | Apply the settings to the current scene. |
| Apply to Scene | When you select the scene, the settings will be loaded and used for rendering. |
| Reset Camera | Resets any changes to the camera. |
| Save Defaults | Saves all current render settings as default starting settings. |
-
Output
Image Dimensions Configures the width and height of the render to be created. Keep in mind that the free version of Indigo can only render images up to 1000x700 pixels in size; you will need to order a licence to use higher resolutions. Region Rendering Region rendering allows you to render only a small part of the scene. This is similar to moving the camera, but is useful when you need to focus the render on a part of the full image. Save to .IGI Saves an IGI file for reach rendered scene. On by default. Custom Image Name Enable this to use a custom name for the PNG image that is automatically saved when rendering. Watermark Enable this to add the Indigo logo to the rendered image. The free version of Indigo will always do this, regardless of this setting. Image Name To use this image name, the Custom Image Name checkbox must be checked. Image Path Renders will be auto-saved to this directory. Thumbnail Path Material preview images will be saved to this directory. Auto-Save Period Enter the time interval in seconds that the rendered image will be saved. -
Camera
See Camera
-
Tonemapping
See Tonemapping
-
Environment
See Environment
-
Advanced
Indigo Manual > Indigo for SketchUp > Render Settings
Clay Mode
If the SketchUp Face Style is set to Monochrome, SkIndigo will export the scene in Clay mode.
This is where all the materials are replaced with a grey diffuse material. This can be helpful for checking geometry and lighting without being distracted by materials.
To enable clay mode, Go to the View menu in SketchUp, then select Face Style > MonoChrome
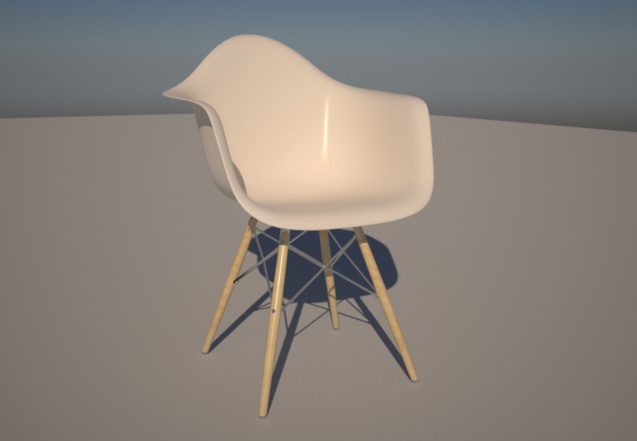
Clay mode disabled
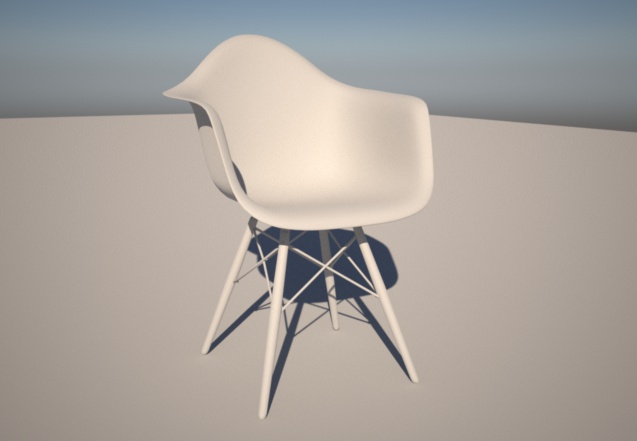
Clay mode enabled